No log-in? Ask your teacher to get approval.
Or go to the registration form.
In this post, you’ll find out what you need to know about WordPress, how it works, and if it’s easy to learn. Let’s get rolling!.
WordPress is probably best known for blogging. At least that’s how it started in its earliest form. But it has since gone much further than blogging and can now drive various websites. This is because WordPress is essentially a powerful CMS (Content Management System). CMS platforms allow workgroups or individuals of all difficulty levels to publish consistently formatted content on their website quickly and easily. No coding or technical knowledge is required at all.
However, the real strength of WordPress lies in its adaptability and flexibility. In the beginning, WordPress prevailed not only for its usability, but also for open source. This means that tech-savvy users can immerse themselves in WordPress background code and customize it in several ways. In addition, a large developer community around WordPress has developed and created and published all types of add-ons and extensions to improve WordPress performance.
For you and me, this means we can use WordPress to run all kinds of different websites – from personal websites to large ecommerce websites – all because of the open source philosophy, ease of use, and large community of WordPress developers.
Very simply, WordPress plugins are add-ons that extend the behaviour and capabilities of your website. So, plugins can handle anything from contact forms and photo galleries to integrating your social media feeds and even running an online store or membership website.
If there’s something specific you want to include on your website, you can simply add it on via a WordPress plugin.
Some plugins will appear in the front-end of your WordPress website, where your visitors will interact with them. A contact form is a great example. Other times, plugins might only be used behind the scenes to handle things like site security and data backup.
We strongly advice you not to add plugins to your website. Plugins from old generations might crash your website.
Our service desk can not help you with plugins installed by you or any body else. There are too many plugins available and we can not test them all.
Themes control all of the design elements of your website. So everything from fonts, colours, stylings, page layouts and more are all controlled by your WordPress website’s theme.
So if you’re interested in design, as I am, then you’ll want to learn more about themes and how they work.
What’s so cool about themes is that they behave like templates — you can simply install a new theme and activate it, and the entire look and feel of your website changes instantly. And because WordPress is so popular, tens of thousands of themes have been developed and released for use. Like plugins, most are free while others are paid.
We strongly advice you not to add themes to your website. themes from old generations might crash your website.
Our service desk can not help you with themes installed by you or any body else. There are too many themes available and we can not test them all.
Elementor is a page builder plugin that replaces the basic WordPress editor with a live frontend editor, so you can create complex layouts visually, and design your website live, without having to switch between the editor and the preview mode.
Using Elementor is out-of-scope for your course. But in case you want to eductae yourself take some time at:
Youtube video: Getting Started With Elementor (3 minutes)
Youtube video: Elementor Tutorial: Getting Started – 3 minutes Overview
meer uitleg: ‘How to Create a Complete WordPress Website With Elementor‘
WooCommerce is already installed on your website. Don’t install it again, you will loose all pre-installed settings like payment, email services, Taxes calculation and others.
Skip the installation and jump directly to 30:20 minutes in this video:
More help needed?
You do not need the paid version of following tools and plug-ins:
CMS:
EDITORS: (change text and lay-out)
- Advanced Editor Tools (TinyMCE adv) (Text edit in the WP-blocks)
- Elementor (Page design/lay-out)
- Elementor -Header, Footer & Blocks
SECURITY:
SOCIAL MEDIA:
MARKETING:
- YOAST (SEO analysis)
- Google Analytics Dashboard for WP (GADWP by ExactMetrics)
- Google Ads & Marketing by Kliken
- Jetpack (marketing tools)
- TranslatePress (Multilingual)
- WooCommerce Cart Abandonment Recovery
- WPForms Lite (contact form and surveys builder)
GRAPHICS & IMAGES:
- Smush (images optimization and compression)
THEMES:
Above plug-ins, themes and tools have a proven track-record, are complying to privacy regulations and are support from their builders. Do not use other tools or plug-ins! They might make your webshop unstable or crash it. Your data and sales might get lost
No, WooCommerce is already installed.
All needed info is already set-up for you
- Tax
- Transport/Shipping costs
- Shipping classes
- Payment provider
- Legal statements
- return policy
Do not change them! When changed you personally will be charged for the costs.
No, all orders are handled by the order pickers in Apeldoorn. Products offered by you are not in the Apeldoorn warehouse. It will also generate problems in case of warranty and returned goods.
A common mistake is starting to change the theme of a website. It sounds nice, to begin with (re)designing a webshop. However, design has a much lower priority.
Waisting your time on redesigning and having less time left to generate traffic to the site will bring you no turn-over. The result will be that you go bankrupt with your beautiful website.
Beter is to start with checking the website’s correct working, next start creating much relevant traffic.
The last step is spending time on designing.
Ask yourself, ‘how successful and appealing are webshops like Amazon.com and Marktplaats.nl? They are not beautiful, but they are highly successful!
By the way, do you get your grade for the design or for the number of relevant visitors and the number of transactions?
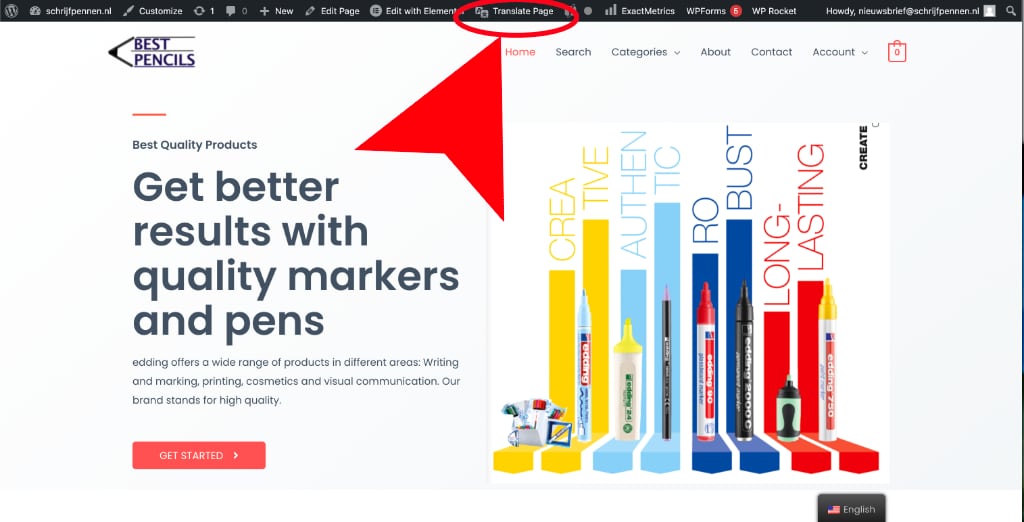
Step 1: Log-into your shops CMS (WordPress)
Step 2: Select in the top-left your webshop- visit site (in this example -ecommercecourses-visit site)
Step 3: Select the page you want to edit
Step 4: Select in the black top-bar the option: Translate Page (in Dutch version: Vertaal Pagina)
Tip: do not select the option: Settings)
Step 5:
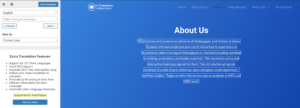
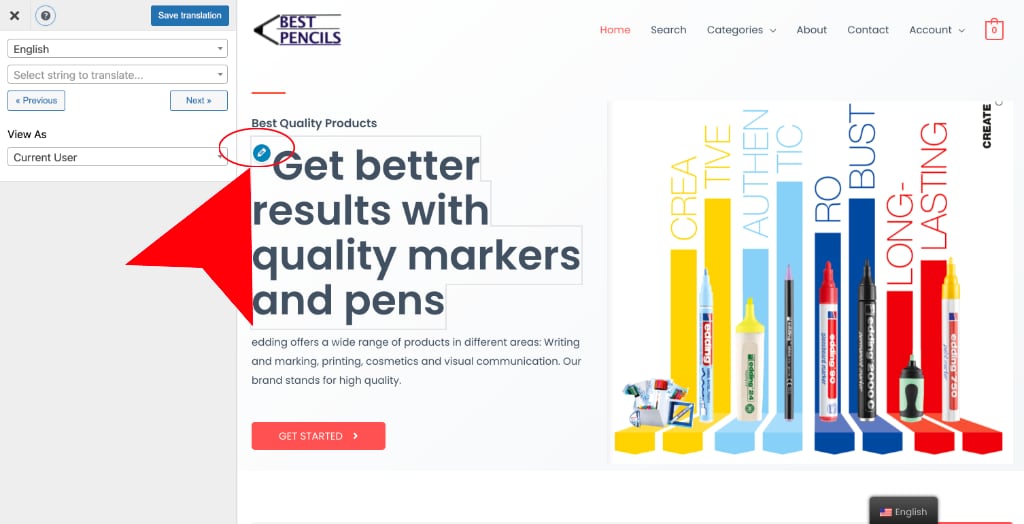
Step 6: Select the text you want to edit (On-mouse over a pencil will be shown, click on that small pencil)
Step 7:
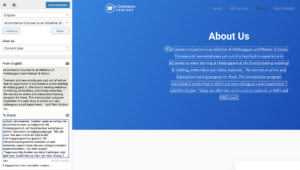
In the left column enter the English and the Dutch text and/or images.
To save click on the Save Translate button at the top of the column
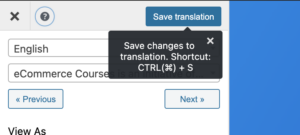
Exit from the translate page by clicking the X (Top left)
Learn more about this plug-in? Visit the developers website TranslatePress.com
No, you can’t change the URL of the webshop, neither can you change the shop name.
The URL is registered at the domain agency and makes your webshop accessible via the global DNS (Domain Name Service). Changing the name in your CMS will break the DNS connection and makes your webshop inaccessible.
access to the administration tool is possible via: website URL + wp-admin (example: mywebsite.com/wp-admin)
Here is the step-by-step guide for adding a BLOG page to your webshop:
Step 1: Create the blog page in WordPress
- Go to the WordPress Dashboard.
- Click on Pages in the left-hand menu.
- Click on the Add New Page button.
Step 2: Name the page
- Enter the title of your page in the Add Title field (for example, “Blog”).
Step 3: Fill the page using Elementor
- Click on the Edit with Elementor button to edit the page using the Elementor page builder.
- Add the desired content to your page by using Elementor’s elements (such as text, images, etc.).
Step 4: Publish the page via Elementor
- Click on the Publish button at the bottom left of the Elementor screen.
Step 5: Exit Elementor
- Click on Exit to Dashboard to leave Elementor and return to the WordPress dashboard.
Step 6: Go back to Dashboard – Pages
- Go back to Pages in the left-hand menu.
Step 7: Hover over the name of your Blog page
- Hover your mouse over the name of the newly created Blog page. Options like Edit, Quick Edit, Trash, etc., will appear.
Step 8: Select Quick Edit
- Click on Quick Edit.
Step 9: Select the Parent page
- Find the dropdown menu next to Parent in the Quick Edit window.
- Select Info (or another desired menu option) from the dropdown.
Step 10: Click Update
- Click the Update button to save your changes.
The blog page is now added to your webshop and can be found under the INFO menu option.
You might want to make the language you translated your website into the first one.
To do this, go to Settings -> TranslatePress and set the Use subdirectory for default language option to Yes. Then, using drag and drop, drag the language you want to be the default one to the top.
Ex.
Select the original language from the drop-down your website was written in. (English)
By default the language is inherited from the WordPress language that you can setup on install or change from Settings -> General.
Clicking on this tab will open the Translation Editor in the frontend of the site where you can begin translating your site.
The main functionality of the translation editor is the possibility to translate string by string your entire page.
Simply hover over a string, click the edit button ![]() that appears on the left and translate your string in the left translation interface.
that appears on the left and translate your string in the left translation interface.
You can access the TranslatePress plugin settings in the administrator area in the menu under Settings -> TranslatePress.
It can also be accessed both from the frontend and administrator area from the Admin Bar under the newly created button under the Settings drop-down.
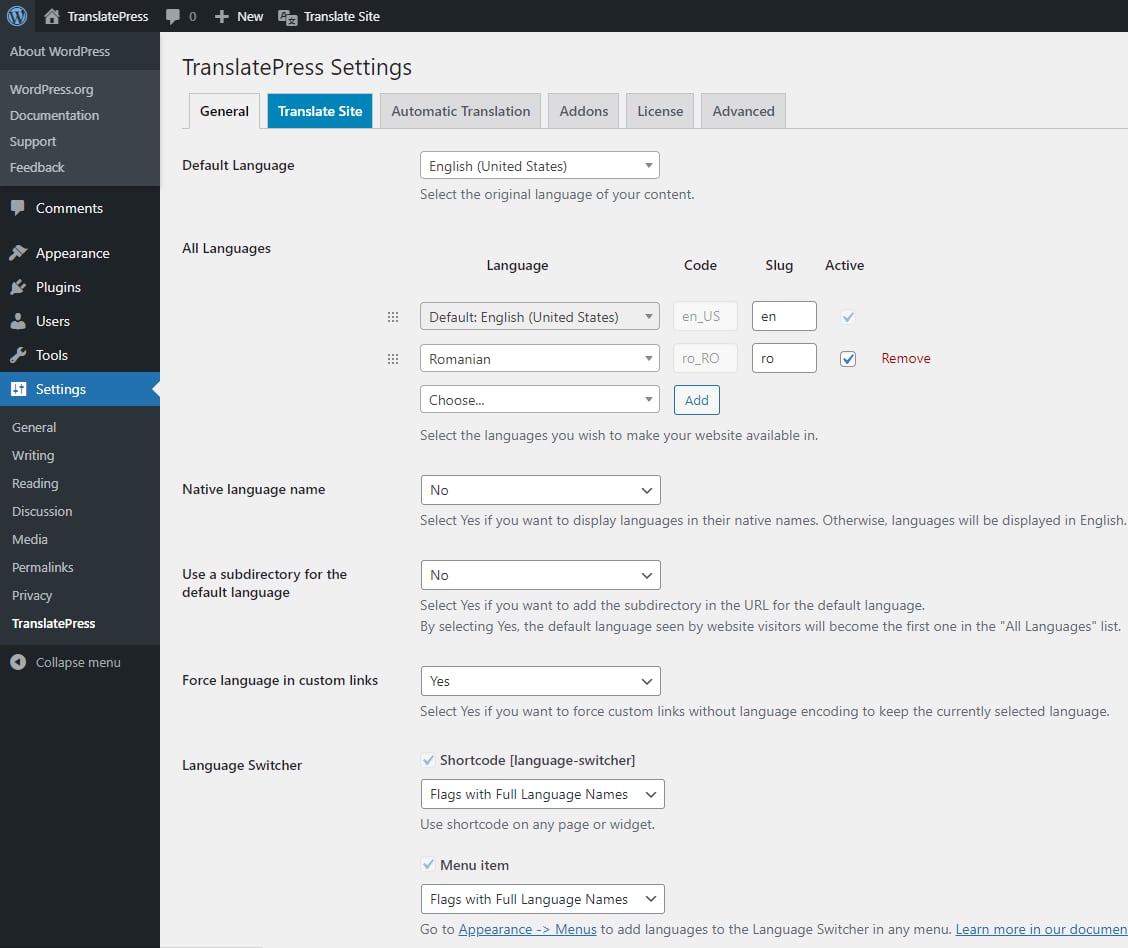
Default Language
Select the original language from the drop-down your website was written in.
By default the language is inherited from the WordPress language that you can setup on install or change from Settings -> General.
Translation Languages
Interface which allows you to select the languages you wish to make your website available in. You just have to select the language from the drop-down and click the Add button.
Actions you can perform on the languages:
- edit the slug of the language that will appear in the urls of the site from the Slug input
- remove the language by clicking the Remove link ( this will not delete the existing translations from your data base )
- rearrange the order of the languages with the drag drop interface. This will determine the order in the language switcher floater and shortcode.
Display languages in their native names
Select Yes if you want languages to display in their native names. Otherwise, they will be displayed in English.
Google Translate
Enable or disable the automatic translation of the site with Google Translate. Existing translations will be not be affected.
Note: Not all languages support automatic translation. Please consult the supported languages list.
With TranslatePress you can show different images for each language of your website.
To do this just click the ![]() button corresponding to the image you want to translate or select the image by name from the dropdown of strings under Images option group
button corresponding to the image you want to translate or select the image by name from the dropdown of strings under Images option group
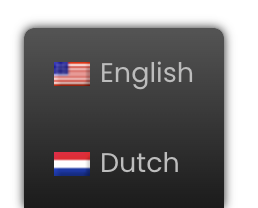
Possible problem in front end:
Visitor selects another language, but continues to see the English version.
Explanation:
The website is made in English by default, after which the English version is translated using the TranslatePress plugin. If the relevant text has not been translated into Dutch, the original text (in English) will be displayed.
Check:
Visit another page and check whether it is shown in the desired language. Is this in the correct language? Then the plug-in works correctly and the other text still needs to be translated.
Possible problem in front-end:
When viewing the front-end in Dutch and start editing in Elementor, the website switches to the English version instead of showing the Dutch version.
Explanation:
Elementor shows the default language of the website. If the website is made in English and then translated into Dutch, Elementor shows the English version.
Warning:
When chaning the defaulkt language in WordPress, all translations will be erased. Therefore, Do not change the default language.